Internet

In order to pay your bill, please visit your Account Portal here.
In order to visit your Account Portal, please click here.
In order to check your Account Balance, please visit your Account Portal here.
We need to Speak.
We’re sorry to hear that you are experiencing trouble with your service. It would be best to speak with a live agent for direct support. Please call us at:
Direct: 416-663-9600
Toll Free: 1-877-474-6638
In order to check your ticket status, please call us at:
Direct: 416-663-9600
Toll Free: 1-877-474-6638
In order to check for trouble in your area, please call us at:
Direct: 416-663-9600
Toll Free: 1-877-474-6638
In order to confirm your Wi-Fi password information, please call us at:
Direct: 416-663-9600
Toll Free: 1-877-474-6638
In order to update or exchange your equipment, please call us at:
Direct: 416-663-9600
Toll Free: 1-877-474-6638
In order to receive a copy of your contract information, please call us at:
Direct: 416-663-9600
Toll Free: 1-877-474-6638
In order to update the email address or cell phone number on record for your account, please call us at:
Direct: 416-663-9600
Toll Free: 1-877-474-6638


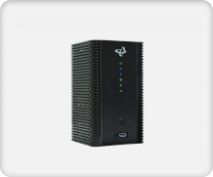
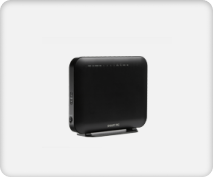
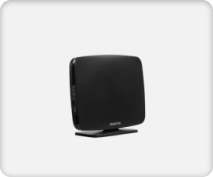
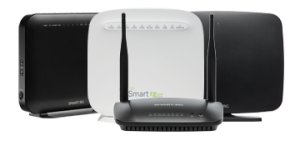
The Comwave Internet Modem is backed by a 1 year manufacturer’s warranty against any manufacturer’s defects. Comwave offers a lifetime extended warranty for only $3 per month. If anything should happen to the modem at any time, we will replace it free of charge.

Please follow the steps below:
Please check the following:
Please follow the steps below:
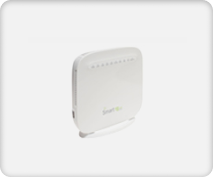
For DSL:
For Cable Hitron CGNM 3550 Modem:
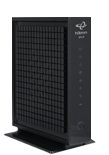
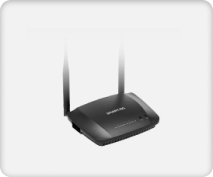
For Cable Hitron CODA 4680 Modem:
The Hitron CODA 4680 by default has the “Band Steering” feature enabled which automatically connects your devices to either the (2.4G or 5G) network that offers the strongest signal. Only one network will appear when searching for Wireless connection even if you setup a different Wi-Fi network name and password for each network (2.4G and 5G). To be able to connect to each network separately, you will need to disable the “Band Steering” feature first by following the steps below.
Disabling the Band Steering Feature
Changing the Wi-Fi Network Names and Passwords
Please check the following:
Please follow the steps below:
For DSL:
For Cable:
Please follow the steps below:
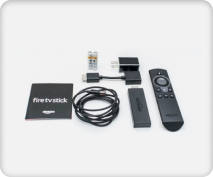
Yes, you can watch Comwave TV on multiple TVs. In order to view Comwave TV on multiple TVs, you will require one Amazon Fire Stick for each TV you’d like to watch on. Your Comwave TV account can accommodate up to 5 Fire Sticks to watch on 5 different TVs, and for an additional $5/month fee can accommodate 7 Fire Sticks.
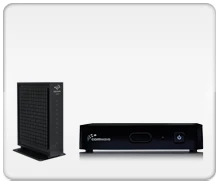
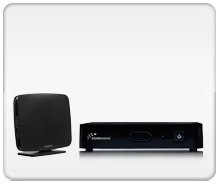
The Comwave Set Top Box can only be used with a Comwave internet connection, while the Comwave TV App installed on the Amazon Fire Stick can be used from anywhere there is internet service.
Netflix is available for download on the Amazon Fire Stick. Unfortunately, Netflix is not available for download through the Comwave Set Top Box.
Make sure the Set Top Box or Fire Stick is turned on and ensure the TV is set to the proper input source.
There is no limitation to the amount of shows you can record at once.
You can store up to 250 hours of recordings.
ComwaveTV requires active internet to view live and recorded shows.
If you are experiencing buffering or freezing this is likely due to a slow internet connection or weak Wi-Fi signal. For customers using a Comwave Set Top Box, we recommend using an Ethernet cable from your internet modem to your Set Top Box for optimal TV experience.
Ensure your Comwave TV is powered on.
Check your internet connection.
Reboot your Comwave set top box by unplugging the power cord on your set top box, waiting 10 seconds, and plugging the power cord back in.
If there is no problem with your Internet connection and you continue to see a black screen, it could be related to the feed or you may not be subscribed to this particular channel. Please go to comwave.net/help/ and submit a “Trouble With My Service” ticket and a Technical Support representative will contact you.
Some channels may be missing because there is a filter applied to the Guide.
There may be an issue with your internet connection. To ensure there is no issue with your connection, please check to ensure that your internet is working. If the issue persists, please contact the Comwave Technical Support Team at 416-663-9600.
You may be experiencing a lack of audio because the volume is not turned up on your set top box and/or TV. If you are using a Comwave Set Top Box, please ensure that you adjust the volume using the Set Top Box remote. Also check to ensure that you have not accidentally activated the Mute button.
Dial ( * 98 ) to enter your mailbox.
Dial your Comwave Home Phone Number, press ( * ) during the greeting message to enter your mailbox, then enter your password.
Get an email notice when someone leaves you a VoiceMail message.

Some telephone companies charge as much as $7.50 per month for Caller ID with Name. At Comwave we believe that it should be included which is why most of our plans include It for free. Nice! In case you don’t know, this feature allows you to see the name and phone number of the person calling you.
Dial * 67 followed by the number you wish to call.
This is a great way to protect your privacy and it’s free on all our Home Phone plans. It allows you to make a call without the other party seeing your Name or Number on their display. You can activate Caller ID Block on a per-call basis (for only one call), after that the Caller ID will return to its previous status.
Start protecting your privacy with Comwave Caller ID Block.
Comwave’s Call Waiting service allows you to accept an incoming call while you’re already on the phone. This allows you to answer the second call and put your first call on hold.
Easy to use:
Call waiting Off:
When you are on the phone and another call comes in, Visual Call Waiting allows you to view the caller’s name and number so you can decide whether or not to take the second call.
Call Forwarding All lets you easily forward incoming calls to any phone number in North America.
Easy to use:
To deactivate call forwarding dial * 73.
This answering service stores up to 20 messages, and allows you the flexibility of listening to your messages via email, phone, or on-line. Your greeting can be 2 minutes long and each message can also be 2 minutes long.
We all know that there are times of the day where it’s just not convenient to take a call. This feature allows you to send calls directly to VoiceMail without the phone even ringing.
It could be the morning when you are getting the kids ready for school, or at night when the family is sitting down to dinner.
We are also working on an enhancement that will allow you to set a schedule and exceptions so that if Mom calls…your phone stills rings.
This feature is controlled from the My Account Web Portal and the Comwave Home Phone by dialing * 78 to Activate and * 79 to Deactivate.
This feature allows you to have a conference call with 2 other people.
Easy to use:
Why program individual phones with speed dial memory locations on EACH phone? With Speed Dial Memory on your phone, all your phones are instantly programmed with the same speed dials.
Easy to use
All Comwave Home Phone customers can call each other FREE anywhere in the world.
So let’s say you live in Toronto and you mom lives in San Francisco. If both of you are Comwave Home Phone customers you can talk for free without any long distance calls. If you have a Comwave Video Phone, you can also see each other while you talk!
My Account lets you control your Comwave Services:
Simply register for My Account, and away you go!
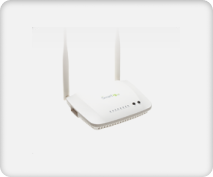
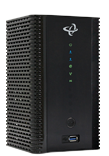
The Comwave Home Phone Adapter is backed by a 1 year manufacturer’s warranty against any manufacturer’s defects. Comwave offers a lifetime extended warranty for only $3 per month. If anything should happen to the adapter at any time, we will replace it free of charge.
Comwave Home Phone service uses a digital technology called VoIP [Voice over the Internet] that allows you to use your existing Internet service to make and receive regular phone calls. You will enjoy enhanced services like Enhanced VoiceMail, Caller ID, and Visual Call Waiting just like traditional phone companies offer. All you need is a High Speed Internet connection and our Comwave Home Phone VoIP Adapter and your savings start right away.
To make a Local call… dial area code + number
To make a Long Distance call… dial 1+ area code + number
To make an International call… dial 011 + country code + city code + number
With Comwave Home Phone you could be making calls from Toronto today, and Vancouver next week, simply by taking your Comwave Home Phone VoIP Adapter everywhere you go.
To call anywhere in the world for free, both parties need to have Comwave Home Phone. All Comwave Home Phone-to-Comwave Home Phone calls are free regardless of where they are in the world. Comwave Home Phone also offers unbelievable world-wide long distance rates!
You can find our current rates using the “Long Distance Rates” box on the right side of your screen.
Follow the link below to sign into your Comwave My Account.
Enter your username and password.
You can do almost anything to personalize your Comwave Home Phone. When you log into Comwave My Account from any page at www.comwave.net, you can do the following, and more…
To log in, you will need to enter the Comwave Username and Password you created when you registered as a New User.
Yes. Comwave Home Phone service will work with DSL or Cable High Speed Internet from Canada’s leading service providers like Rogers Cable, Bell Sympatico, Shaw Cable, Telus, Videotron, Look, and many more.
Voice over IP may experience difficulty with Satellite Internet Service because of the inherent delay in Satellite Internet Service. Participants in a conversation will experience pauses; it takes nearly half a second for the signal to be received by the Satellite and another half a second for the signal to be transmitted back to the ground. Therefore, it can take at least one second for the person on the other end of the conversation to hear what you said. VoIP with Satellite Internet will still work, but you will need to accept a much slower-paced conversation than you are used to.
Yes, in most cases it will work with intercom and door buzzer systems. We have thousands of customers who are using our Service right now with their buzzer system. And remember, if you face any issues with your intercom or buzzer, our Technical Support Team is here to help.
Yes. As soon as you receive your Comwave Home Phone Adaptor, simply set it up and begin making calls using the temporary phone number assigned to you. When you are sure you love the service, simply complete the Number Transfer Form located on My Account. The transfer may take up to 14 days from the date the form is submitted. Once the transfer is completed, your original phone number will begin to ring on the telephone you’ve connected to the Comwave Home Phone Adaptor and your billing with your previous phone company will stop. It is important that you do not cancel your existing number prior to submitting the Number Transfer Form, otherwise the transfer will not be completed.
Yes. As a Comwave Home Phone customer you are not limited to choosing a number from your local area. You can select a number from most major cities in Canada. For example… you live in Toronto in the 416 area code but your mother lives in Montreal in the 514 area code. You can select a 514 number so that she can call you for Free!
Yes. Comwave Home Phone 911 works through a third party that answers your emergency calls and then dispatches the authorities. It is IMPORTANT that you log into Comwave My Account and ensure that your address information is up to date.
411 Information includes Directory Assistance at a cost of $1 per call.
No. Comwave Home Phone service is very easy to install and you will use the same telephone or cordless phone that you would normally use with your local telephone company. In addition to our great Technical Service Team, we have a quick and easy guide available to you at www.comwave.net/installation
The only things you need to have are a High Speed Internet service (Cable or DSL) and a standard analog telephone. We recommend a cordless phone set. Comwave Home Phone will provide the additional equipment required (Comwave Home Phone VoIP Adapter) to set up and use Comwave Home Phone service.
Your Comwave Home Phone Starter Kit will arrive within approximately 7 to 10 days. You can install it and start using it in minutes.
Yes. If you move, you can keep your service and your phone number. You just need to have a High Speed Internet connection at your new location.
Yes. You can take the Comwave Home Phone VoIP Adapter with you and use it anywhere a High Speed Internet connection is available.
We really don’t recommend it if you rely on a fax machine for your home business or important personal affairs. A successful fax is related to your Internet connection, its quality and your fax machine. Fax machines were never designed for use on the Internet, and while it works much of the time, success cannot be guaranteed. Our Technical Services Team cannot answer questions regarding faxes nor provide instructions for faxing on Comwave Home Phone service.
If you plan on using Comwave Home Phone service as your primary phone service you will need to have your alarm company connect your alarm system to your Comwave Home Phone. They will need to program the alarm panel to use SIA format. VoIP is very common now so your alarm company will know what to do.
For every one of your Comwave Home Phone lines, you can select up to 10 new numbers from any Comwave city, to allow unlimited calling to you. Each CityFREE™ number is only $1.95/month each. By choosing a different city for each one, your friends and family can reach you from that city with no long distance charges to them. For example, you have a Toronto Home Phone line. You select a Montreal CityFREE™ number and link it to your Toronto Home Phone line. Anyone from the Montreal local area can now call you in Toronto at no charge to them. This is something the Phone Companies would never allow you to do. Why lose touch with loved ones when you can have CityFREE™.
If you don’t have a dial tone, please check the following:
The quality is affected by various factors outside of our control. If you are experiencing quality issues the next step would be to determine if the issue is with the Hardware or the Internet.
Please check the following:
Please check the following:
Please check the following:
Please check the following:
Please check the following:
Comwave offers fast, unlimited internet and special bundle deals at incredible value, giving you the speed you need through a reliable connection that supports all your devices.
1-877-474-6638